Amniocentesis involves collecting a small sample of amniotic fluid that surrounds the baby in the womb. It helps detect chromosomal and genetic conditions, such as Down syndrome and neural tube defects, with high accuracy. The procedure is performed under continuous ultrasound guidance to ensure safety.
Why Choose NESA for your Amniocentesis procedure?
Amniocentesis at NESA is all about getting clear, reliable answers when pregnancy raises medical questions—not adding more stress to the mix. Our fetal medicine specialists perform the procedure under advanced ultrasound guidance, ensuring maximum safety and precision at every step. With thorough counseling and trusted genetic testing, we help parents make informed decisions with confidence and calm. Here, it’s not just a procedure—it’s expert care backed by science and years of expertise.
Why did your Doctor recommend an Amniocentesis?
Amniocentesis is not a routine test. If your doctor recommended Amniocentesis it is for the fllowing reasons:
- Your NIPT Screening results indicate a high-risk for Downs or other genetic disorders.
- You have a family history of genetic conditions
- Your age is 35+ and for women with Advanced maternal Age with either of the above factors, it is standard recommendation.
Amniocentesis is for answers—not curiosity. If a doctor suggests it, it’s because they’re trying to give you clarity, not stress levels
Why is Amniocentesis Done?
Amniocentesis is performed to obtain definitive diagnostic information about the fetus when specific medical indications are present. The procedure involves analyzing amniotic fluid, which contains fetal cells and biochemical markers, to assess fetal health and development.
Primary Reasons for Performing Amniocentesis
1. Diagnosis of Genetic and Chromosomal Disorders
Amniocentesis provides confirmatory testing for conditions identified as high-risk through prior screening. Fetal cells obtained from the amniotic fluid are cultured and evaluated for:
- Chromosomal abnormalities such as Trisomy 21 (Down syndrome), Trisomy 18, and Trisomy 13
- Single-gene or inherited disorders when there is a known family history or carrier status (e.g., thalassemia, cystic fibrosis)
Unlike screening tests, amniocentesis offers definitive diagnostic results.
2. Detection of Select Structural or Neural Tube Defects
Amniotic fluid may be analyzed for biomarkers such as alpha-fetoprotein (AFP) and acetylcholinesterase, which assist in identifying:
- Neural tube defects (e.g., spina bifida, anencephaly)
- Certain fetal anatomical abnormalities when suspected on ultrasound
3. Evaluation Following Abnormal Prenatal Screening
The procedure is recommended when:
- First- or second-trimester screening indicates elevated risk
- Ultrasound findings suggest a potential anomaly
Amniocentesis clarifies uncertain results and guides clinical decision-making.
4. Assessment of Suspected Fetal Infection
Polymerase chain reaction (PCR) testing of amniotic fluid may be used to diagnose infections such as:
- Cytomegalovirus (CMV)
- Toxoplasmosis
- Parvovirus B19
This allows targeted management and counseling.
5. Determination of Fetal Lung Maturity (Late Pregnancy)
Although less common with current obstetric practices, amniocentesis may be performed before anticipated preterm delivery to assess surfactant levels, helping determine readiness for extrauterine life.
6. Monitoring and Management of Specific Pregnancy Complications
Examples include:
- Rh isoimmunization, to evaluate fetal anemia severity
- Severe polyhydramnios, where fluid removal may be both diagnostic and therapeutic
What to expect during the process?
Here’s a step-by-step process of how amniocentesis is done:
1. Pre-procedure briefing: The doctor explains why it’s being done, the risks, and gets consent.
No surprises — you know exactly what’s happening.
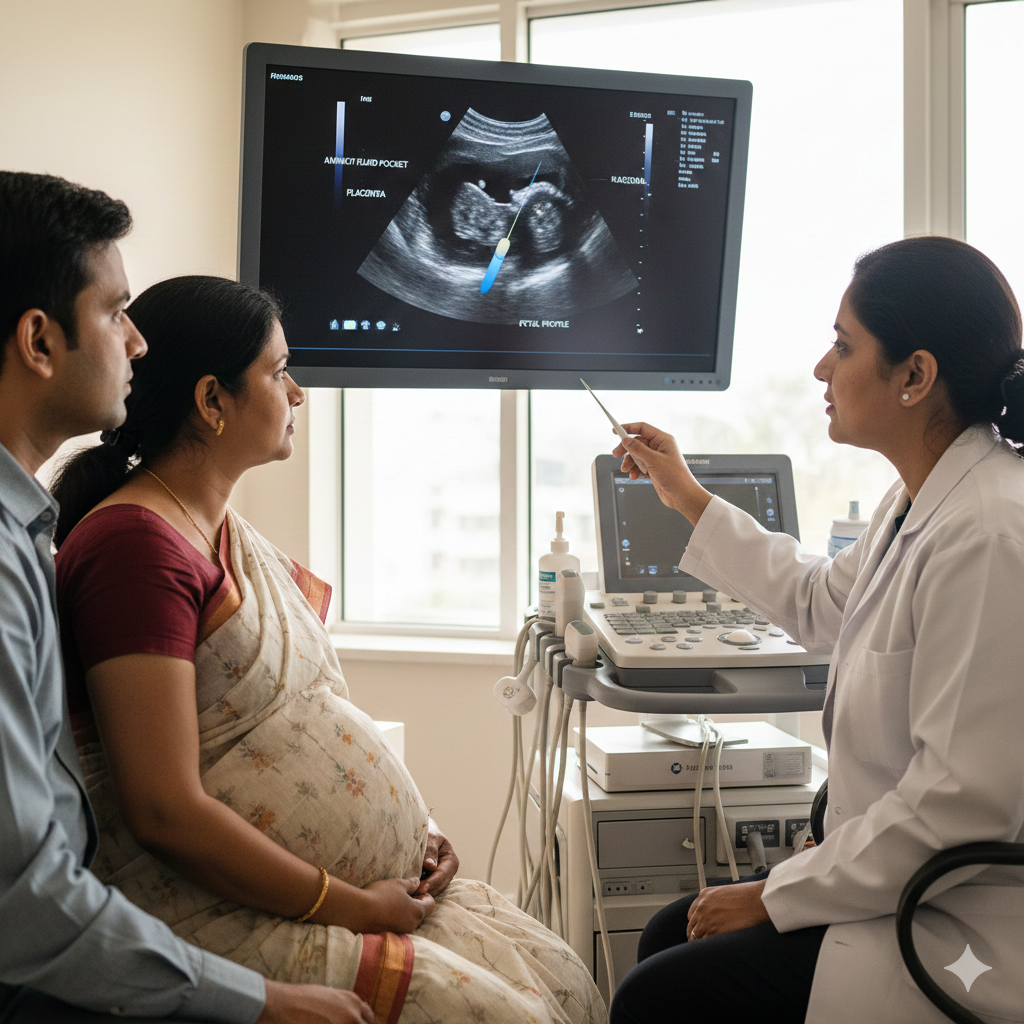
2. Ultrasound check-in: They do an ultrasound first to confirm baby’s position, locate the placenta, find a safe fluid pocket.
3. Belly prep: Your abdomen is cleaned with antiseptic. No anesthesia shots are needed— at most, a numbing spray. It feels more like pressure than pain.
4. Needle insertion: A thin needle is gently passed through, the skin, abdominal wall, uterus into the amniotic sac. You stay still, but the baby is not touched — ultrasound guides the whole thing in real time.
5. Fluid collection : About 15–20 mL (a tablespoon-ish) of amniotic fluid is drawn. The fluid naturally replaces itself.
6. Needle out, ultrasound repeat: The needle is removed, and the ultrasound confirms everything is as it should be.
7. Post-procedure monitoring: You may rest for 20–30 minutes.
8. Aftercare instructions: For the next 24–48 hours:
- No heavy lifting
- No intense workouts
- Watch for fever, leaking fluid, or severe pain (rare but important)
9. Lab analysis : The fluid heads to the lab for
- chromosome testing
- genetic analysis
- AFP levels testing (if checking for neural tube defects)
Results can take a few days to 2 weeks, depending on the test.
10. Follow-up: Your doctor discusses results and next steps.